Request user certificate
FAQ
General
Wenn jemand eine E-Mail digital signiert versendet, können Sie in Ihrem E-Mail-Programm erkennen, ob und welches Zertifikat verwendet wurde. Das ist auch die Voraussetzung dafür, dass Sie verschlüsselte E-Mails an diese Person senden können – denn dafür benötigen Sie den öffentlichen Schlüssel aus dem Zertifikat des Empfängers.
Outlook (Microsoft 365)
Öffnen Sie die E-Mail des Absenders. Bei einer digital signierten Nachricht erscheint im Nachrichtenkopf ein rotes Siegel-Symbol (rotes Band mit Schleife).
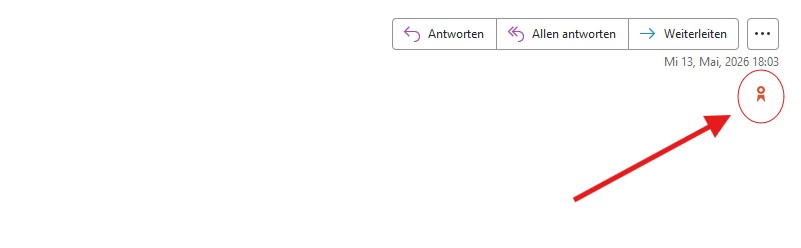
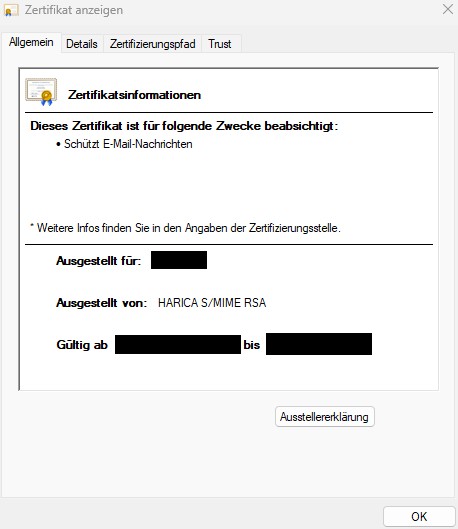
Klicken Sie auf das Symbol. Es öffnet sich ein kleines Fenster mit dem Hinweis „Digitale Signatur: Gültig" Klicken Sie dort auf Details, auf den "Signierer:", dann auf "Details anzeigen..." und schließlich auf "Zertifikat anzeigen..." um weitere Informationen zum Zertifikat zu erhalten, etwa den Namen des Inhabers und die ausstellende Stelle.
Outlook übernimmt das Zertifikat des Absenders automatisch in Ihre Kontakte, sodass Sie anschließend verschlüsselte E-Mails an diese Person senden können.
Thunderbird
Öffnen Sie die E-Mail des Absenders. Bei einer digital signierten Nachricht erscheint rechts oben im Nachrichtenkopf ein Siegel-Symbol.
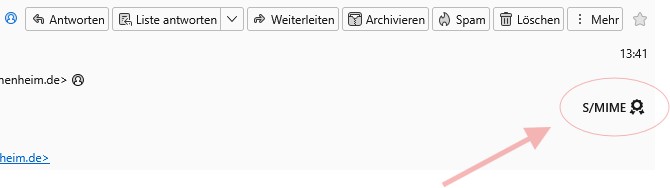
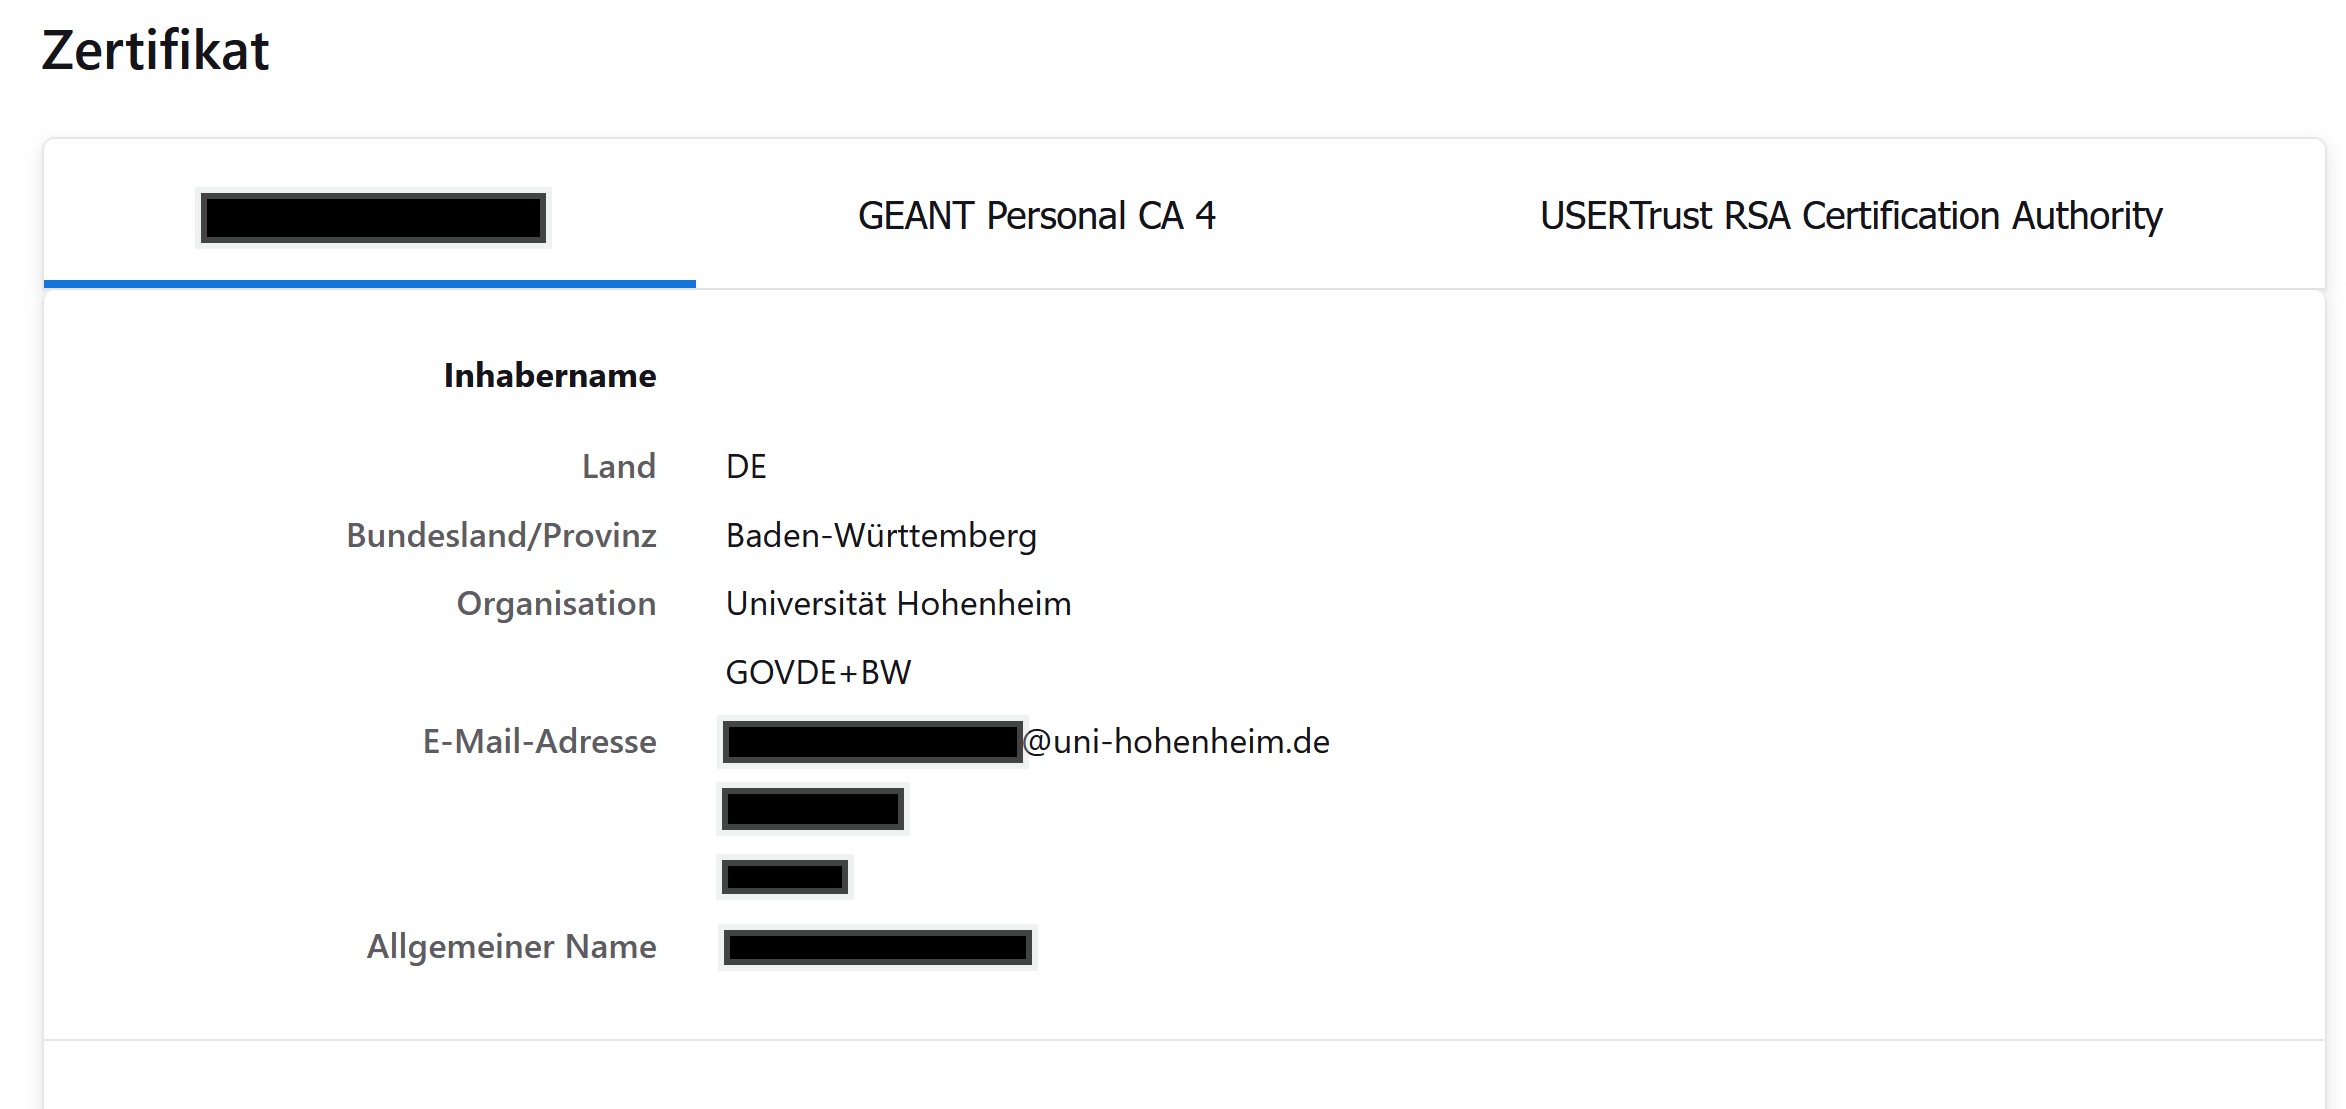
Klicken Sie auf das Symbol. Es öffnet sich ein Bereich, der anzeigt ob die Signatur gültig ist. Über den Button Signaturzertifikat anzeigen gelangen Sie zu den vollständigen Zertifikatsdetails, u. a. Name, E-Mail-Adresse und Gültigkeitszeitraum.
Thunderbird speichert das Zertifikat des Absenders automatisch. Sobald Sie das Zertifikat einmal erhalten haben, können Sie dieser Person auch verschlüsselte E-Mails senden.
Horde Webmail
Öffnen Sie die E-Mail des Absenders. Wenn die Nachricht digital signiert wurde, erscheint im Nachrichtenkopf ein Symbol mit einem Schloss sowie ein Hinweistext zur Signatur.
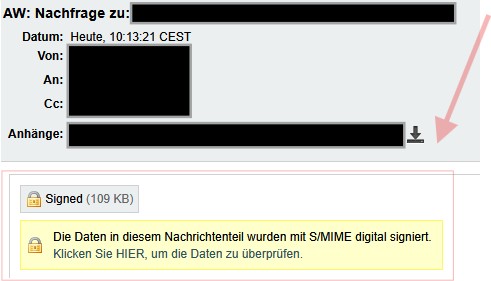
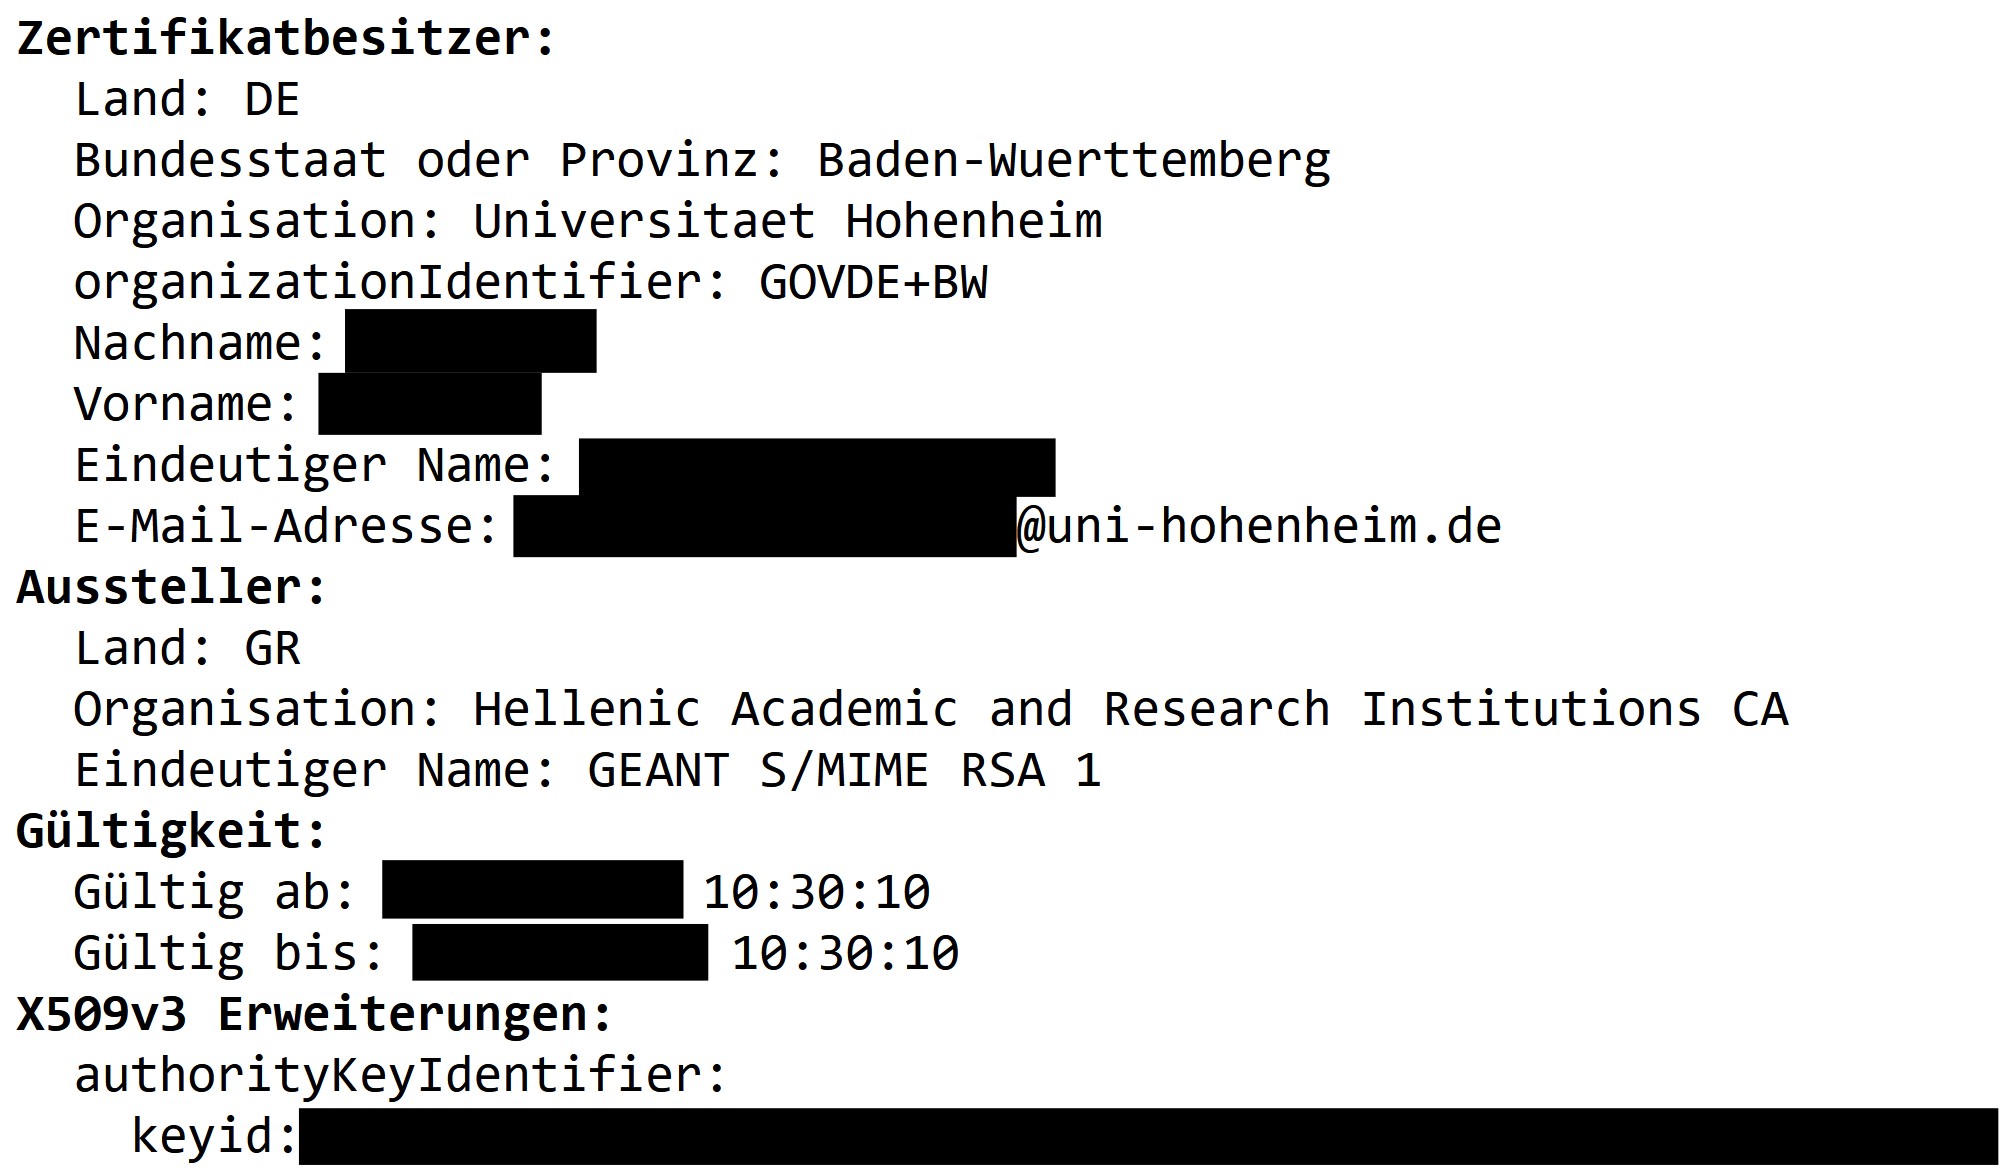
Klicken Sie auf den Hinweistext "Klicken Sie HIER, um die Daten zu überprüfen" und dann hinter "Absender:" auf den Namen des Absenders um Details zum verwendeten Zertifikat anzuzeigen – darunter den Namen des Inhabers, die E-Mail-Adresse sowie die ausstellende Zertifizierungsstelle.
Ja, auch hierfür gibt es im rechten Bereich auf der Website eine Anleitung für den Bezug.
The user certificate has a validity/period of 730 days (2 years).
Outlook
No FAQ's found.
Thunderbird
Error message in Thunderbird: "Certificate management cannot find a valid certificate that can be used to digitally sign your messages with the address <vorname.nachname@uni-hohenheim.de>."
- Navigate to the "Account Settings" under the "Extras" menu.
- Select "End-to-end encryption" on the left.
- Click on the "Select" button under "Personal certificate for digital signature" and under "Personal certificate for encryption" and select the new valid certificate.
Error message in Thunderbird: "Sending the message failed: You have chosen to digitally sign this message, but the application could not find the signing certificate you specified in your account settings or the certificate has expired."
- Navigate to the "Account Settings" under the "Extras" menu.
- Select the "End-to-end encryption" on the left.
- Click on the button "Manage S/MIME certificates".
- Click on "Import" and select the new certificate.
- Click on "Empty" for "Personal certificate for digital signature" and for "Personal certificate for encryption".
- Click on the "Select" button under "Personal certificate for digital signature" and under "Personal certificate for encryption" and select the new valid certificate.
PDF signature
Die eIDAS-Verordnung unterscheidet drei Stufen:
- EES – Einfache elektronische Signatur: Jede Form digitaler Willenserklärung, z. B. ein getippter Name unter einer E-Mail oder ein eingescannter Unterschriftenstempel. Bietet keine technische Sicherheit gegen Manipulation oder Identitätsmissbrauch.
- FES – Fortgeschrittene elektronische Signatur: Kryptographisch erzeugte Signatur, die den Unterzeichner eindeutig identifiziert, ausschließlich unter dessen Kontrolle steht und nachträgliche Änderungen am Dokument erkennbar macht. Entspricht dem technischen Standard, der mit HARICA-Zertifikaten erreicht wird.
- QES – Qualifizierte elektronische Signatur: Eine FES, die zusätzlich mit einem qualifizierten Zertifikat eines zugelassenen Vertrauensdiensteanbieters und einer sicheren Signaturerstellungseinheit (z. B. Signaturkarte) erstellt wird. Nur die QES ist nach § 126a BGB der handschriftlichen Unterschrift rechtlich gleichgestellt.
jkljkl
Die Warnung erscheint auf jedem Gerät, auf dem das Root-Zertifikat nicht importiert wurde – also sowohl beim Unterzeichner als auch beim Empfänger. Dies gilt unabhängig davon, ob ein Nutzerzertifikat vom Typ emailonly oder IV+OV verwendet wird.
Ja, die Warnung verschwindet, sofern auf dem jeweiligen Gerät das Root-Zertifikat „HARICA Client RSA Root CA 2021" manuell in Adobe Acrobat als vertrauenswürdig importiert wurde. Ein automatischer Rollout des Root-Zertifikats findet derzeit nicht statt.
Das Root-Zertifikat kann heruntergeladen werden: HARICA-Client-RSA-Root-2021.p7b (SHA-1: 46:C6:90:0A:77:3A:B6:BC:F4:65:AD:AC:FC:E3:F7:07:00:6E:DE:6E)
Wichtig: HARICA-S/MIME-Zertifikate sind technisch für E-Mail-Signaturen und nicht für Dokumentensignaturen vorgesehen. Der manuelle Import ist daher nur dort sinnvoll, wo Dokumente ausschließlich innerhalb eines kontrollierten Empfängerkreises geprüft werden. Für PDF-Signaturen, die ohne Vorkonfiguration auf Empfängerseite anerkannt werden, sind dedizierte Dokumentensignaturzertifikate erforderlich (siehe FAQ „Welche Alternativen gibt es für extern validierbare PDF-Signaturen?").
Adobe Acrobat zeigt bei PDF-Signaturen mit HARICA-S/MIME-Nutzerzertifikaten folgende Meldung an: „Gültigkeit der Unterschrift ist UNBEKANNT – Die Identität des Unterzeichners ist unbekannt, weil sie sich nicht in der Liste der vertrauenswürdigen Zertifikate befindet und keines der übergeordneten Zertifikate ein vertrauenswürdiges Zertifikat ist."
Ursache ist die fehlende Verankerung des ausstellenden Root-Zertifikats „HARICA Client RSA Root CA 2021" in der Adobe Approved Trust List (AATL). Adobe erkennt dieses Root nicht automatisch als vertrauenswürdig an. Die Warnung verschwindet, sobald das Root-Zertifikat auf dem jeweiligen Gerät manuell in Adobe Acrobat als vertrauenswürdig importiert wurde – das Dokument selbst wurde dabei in jedem Fall nach dem Unterzeichnen nicht verändert.
Getestet am 26.05.2026 mit Adobe Acrobat Pro Version 2026.001.21529 (64-Bit)
Error message in Thunderbird: "Certificate management cannot find a valid certificate that can be used to digitally sign your messages with the address <vorname.nachname@uni-hohenheim.de>."
- Navigate to the "Account Settings" under the "Extras" menu.
- Select "End-to-end encryption" on the left.
- Click on the "Select" button under "Personal certificate for digital signature" and under "Personal certificate for encryption" and select the new valid certificate.
Do you have questions or comments about this site? contact form