Set up TSM Client using Suse
The following installation and set-up of the client was done using Suse SLES 11.
Installation
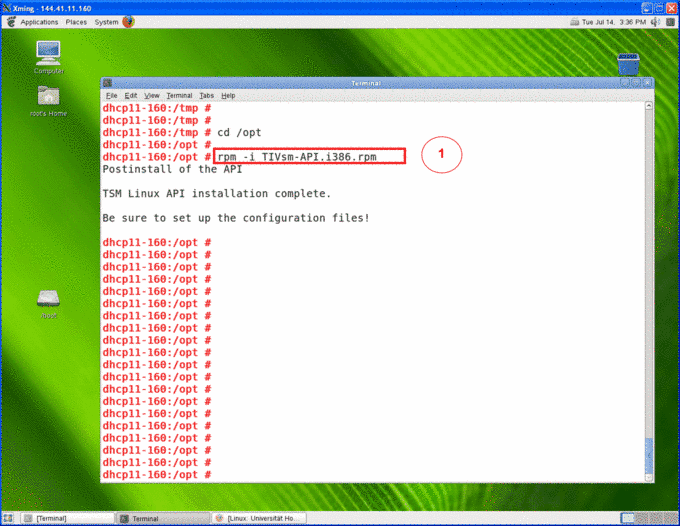
Installation Client
|
|
|
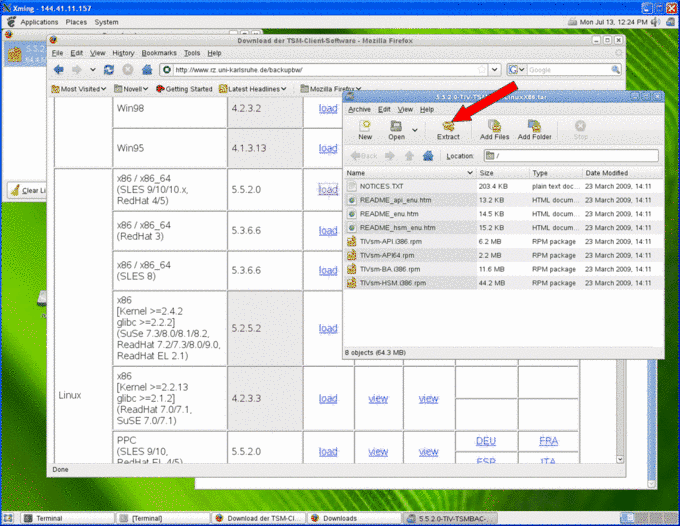 |
|
|
|
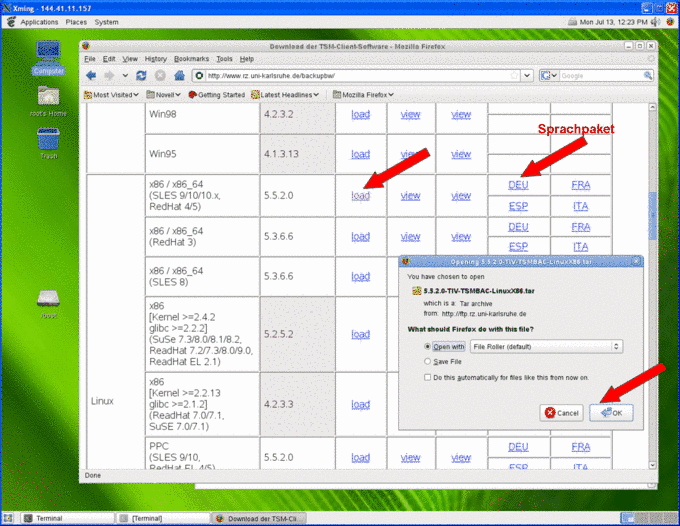
Optional: download and install the language package: |
|

Configuration client
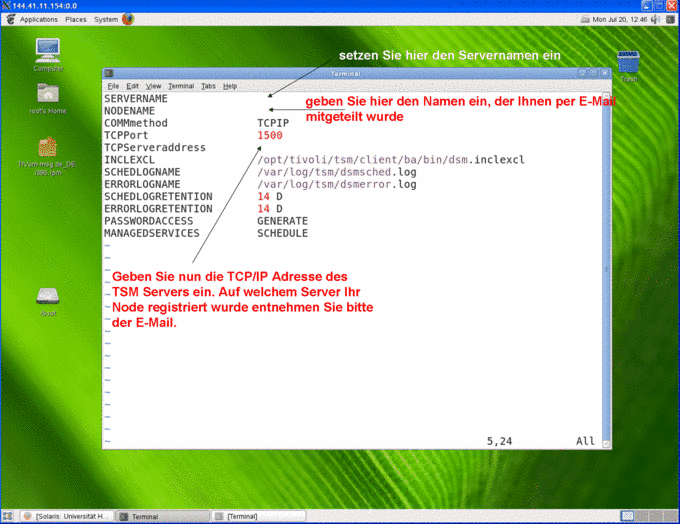
| to access the TSM server, change the two configuration files /opt/tivoli/tsm/client/ba/bin/dsm.opt and /opt/tivoli/tsm/client/ba/bin/dsm.sys as follows: /opt/tivoli/tsm/client/ba/bin/dsm.sys |
|
For example, dsm.sys could look like this: |
| SERVERNAME RUSTSME NODENAME H-000620_POMSUSE COMMmethod TCPIP TCPPort 1500 TCPServeraddress tsmsrvg.rus.uni-stuttgart.de INCLEXCL /opt/tivoli/tsm/client/ba/bin/dsm.inclexcl SCHEDLOGNAME /var/log/tsm/dsmsched.log ERRORLOGNAME /var/log/tsm/dsmerror.log SCHEDLOGRETENTION 14 D ERRORLOGRETENTION 14 D PASSWORDACCESS GENERATE MANAGEDSERVICES SCHEDULE |
|
| EXCLUDE /./tmp/./* EXCLUDE /./core EXCLUDE /./cache/./* EXCLUDE.DIR /var/log/tsm EXCLUDE.DIR /./lost+found |
|
| The configuration file /opt/tivoli/tsm/client/ba/bin/dsm.opt |
|
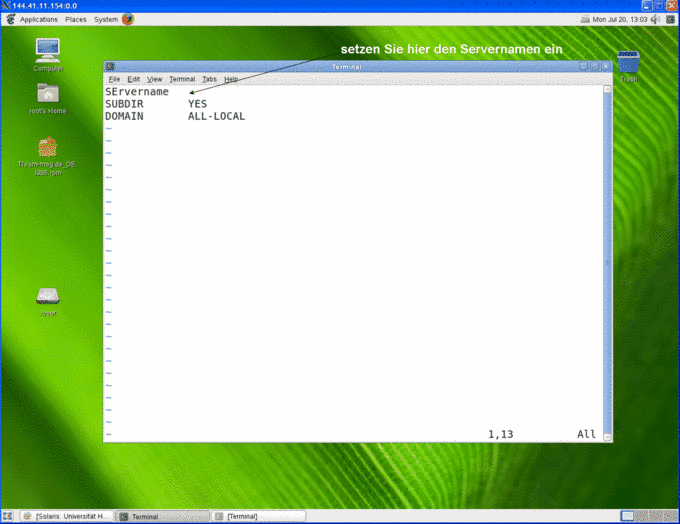
For example, dsm.opt could look like this: |
| SErvername RUSTSME SUBDIR YES DOMAIN ALL-LOCAL |
|
|
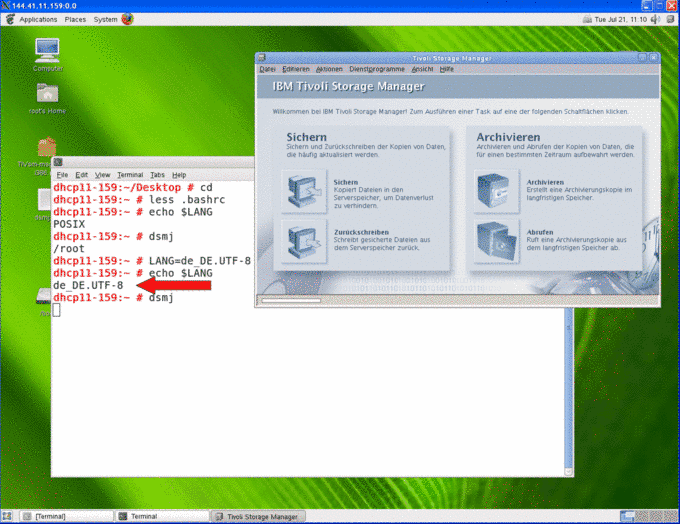
| #TSM Config DSM_DIR=/opt/tivoli/tsm/client/ba/bin DSM_CONFIG=/opt/tivoli/tsm/client/ba/bin/dsm.opt DSM_LOG=/var/log/tsm #LANG=de_DE.UTF-8 export DSM_DIR DSM_CONFIG DSM_LOG LANG |
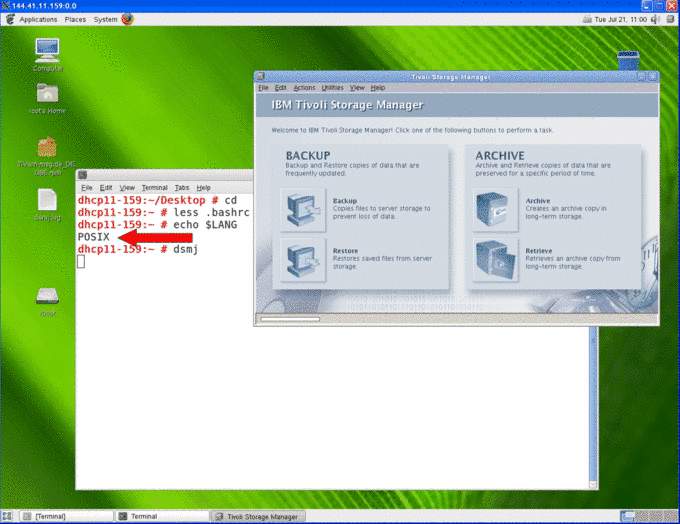
If you have not registered your computer for automated back-up, you are now finished and can start the back-up process.
|
|
|
Configuration scheduler (for automatic back-up)
| If you have registered your computer for automatic back-up, you will still have to configure the client scheduler. | |
| |
| #! /bin/sh # # /etc/init.d/dsmcad # ### BEGIN INIT INFO # Provides: dsmcad # Required-Start: # Should-Start: # Required-Stop: # Should-Stop: # Default-Start: 3 5 # Default-Stop: 0 1 2 6 # Short-Description: dsmcad (TSM client acceptor daemon) # Description: Start dsmcad to launch the Tivoli Storage Manager # client acceptor daemon, which can be used for web client access # as well as client scheduling services. ### END INIT INFO # # Check for missing binaries (stale symlinks should not happen) # Note: Special treatment of stop for LSB conformance DSMCAD_BIN=/opt/tivoli/tsm/client/ba/bin/dsmcad test -x $DSMCAD_BIN || { echo "$FDSMCAD_BIN not installed"; if [ "$1" = "stop" ]; then exit 0; else exit 5; fi; } #Source function library. . /etc/rc.status # Reset status of this service rc_reset case "$1" in start) echo -n "Starting dsmcad" startproc $DSMCAD_BIN rc_status -v ;; stop) echo -n "Shutting down dsmcad" killproc -TERM $DSMCAD_BIN rc_status -v ;; try-restart) $0 status if test $? = 0; then $0 restart else rc_reset # Not running is not a failure. fi rc_status ;; restart) $0 stop $0 start rc_status ;; force-reload) echo -n "Reload service dsmcad" $0 try-restart rc_status ;; reload) echo -n "Reload service dsmcad, not supported" rc_failed 3 rc_status -v ;; status) echo -n "Checking for service dsmcad" checkproc $DSMCAD_BIN rc_status -v ;; *) echo "Usage: $0 {start|stop|status|try-restart|restart|force-reload|reload}" exit 1 ;; esac rc_exit | |
| |
chmod 744 /etc/init.d/dsmcad | |
| /sbin/insserv /etc/init.d/dsmcad | |
| The dsmcad is now running and will connect with the TSM server. The set-up of the client scheduler is thus concluded. After each reboot, it will be automatically started. You will not need to start it “by hand”. | |
| |
| /sbin/insserv -r /etc/init.d/dsmcad | |
| |
| /etc/init.d/dsmcad start | |
| /etc/init.d/dsmcad stop | |
| /etc/init.d/dsmcad restart | |
| /etc/init.d/dsmcad status |
Do you have questions or comments about this site? contact form