Set up TSM Client using Solaris

The following installation and set-up of the client was done using Solaris 10.

Installation

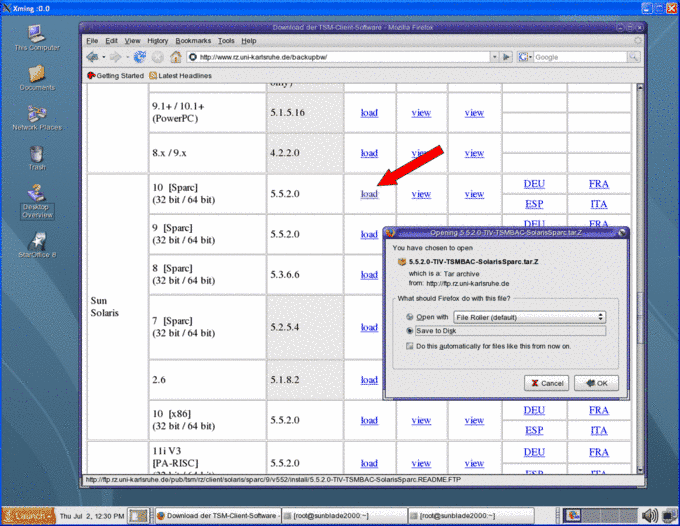
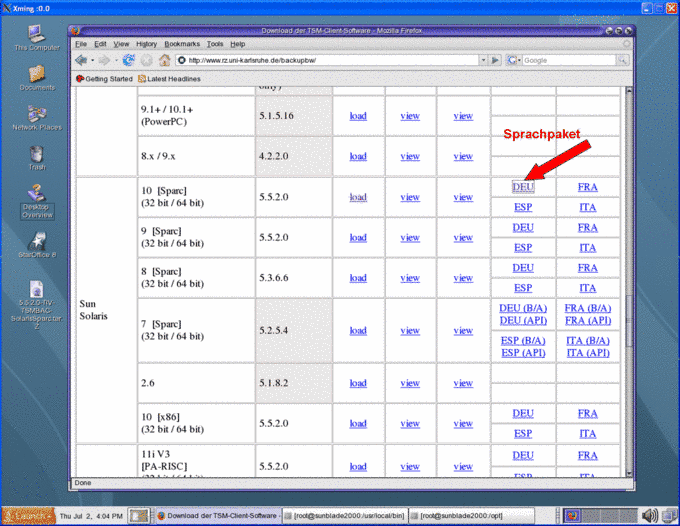
  • Download the newest client for your Solaris version here.  10  [Sparc] for computers with Sparc architecture, or 10  [x86] for machines with x86 architecture. This example shows installation on a computer with Sparc architecture.
  • This website is updated regularly, so the version numbers might change.

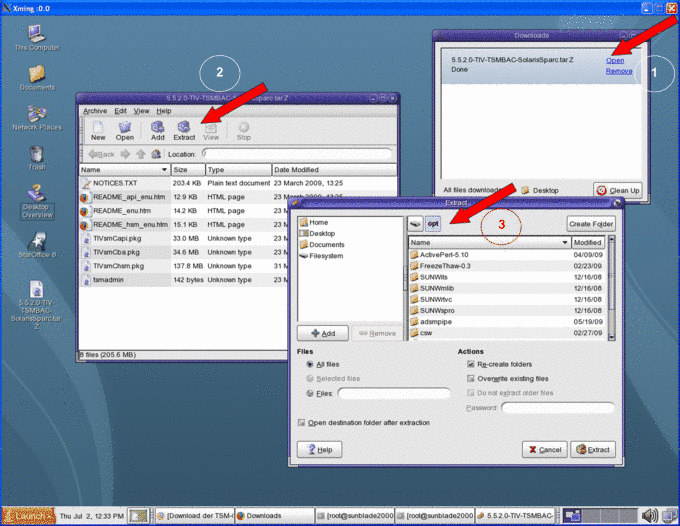
  • Unzip the files in a directory, e.g. in /opt:

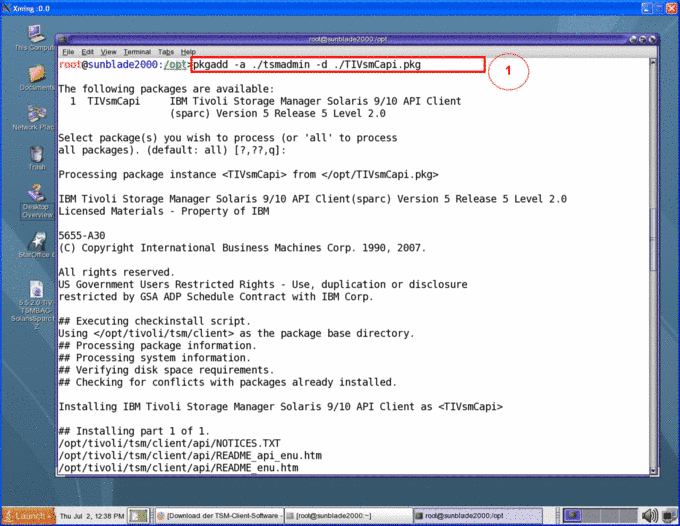
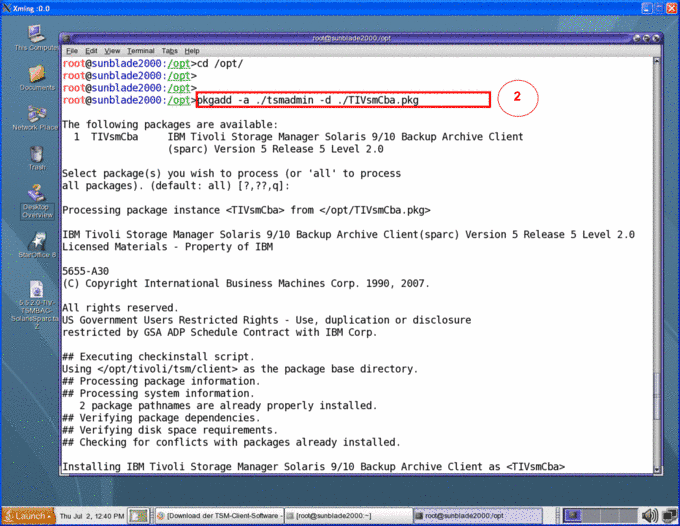
  • Install in the following order:
  • pkgadd -a ./tsmadmin -d ./TIVsmCapi.pkg (1)
  • pkgadd -a ./tsmadmin -d ./TIVsmCba.pkg (2)


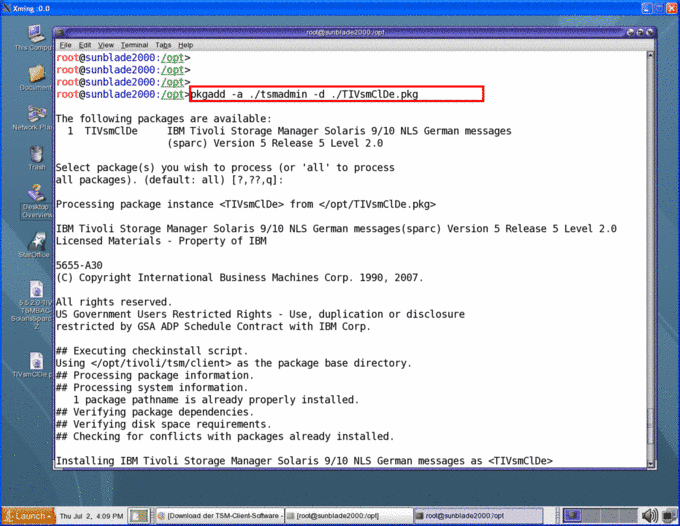
  • Optional: Install the language packet:

  • pkgadd -a ./tsmadmin -d ./TIVsmClDe.pkg

Configuration

Configuration client

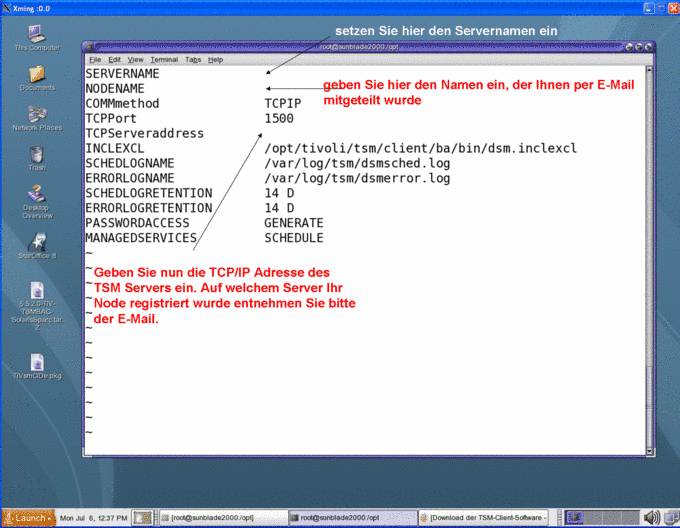
To be able to access the TSM server, change the two configuration files /usr/bin/dsm.opt and /usr/bin/dsm.sys as follows: /usr/bin/dsm.sys

For example, dsm.sys could look like this:


SERVERNAME              RUSTSME
NODENAME                H-000620_POMSOL
COMMmethod              TCPIP
TCPPort                 1500
TCPServeraddress        tsmsrvg.rus.uni-stuttgart.de
INCLEXCL                /opt/tivoli/tsm/client/ba/bin/dsm.inclexcl
SCHEDLOGNAME            /var/log/tsm/dsmsched.log
ERRORLOGNAME            /var/log/tsm/dsmerror.log
SCHEDLOGRETENTION       14 D
ERRORLOGRETENTION       14 D
PASSWORDACCESS          GENERATE
MANAGEDSERVICES         SCHEDULE

  • INCLEXCL gives the path and file names of the “include/exclude” option file.
    Here, you can specify exactly what should be included or excluded in the back up.
    e.g.:
EXCLUDE /./tmp/./*
EXCLUDE /./core
EXCLUDE /./cache/./*
EXCLUDE.DIR /var/log/tsm
EXCLUDE.DIR /./lost+found
  • The log file for the schedule (automated back-up) is called dsmsched.log and is found in the directory
    /var/log/tsm
  • The error log file is called dsmerror.log and is also found in the directory /var/log/tsm.
  • The entries in “Schedlog” are saved for 14 days.
  • The entries in “Errorlog” are saved for 14 days.
  • The password is encrypted and saved locally.
  • In the final entry, you can see that the Client Acceptor Daemon manages the scheduler (see Configuration of Scheduler)
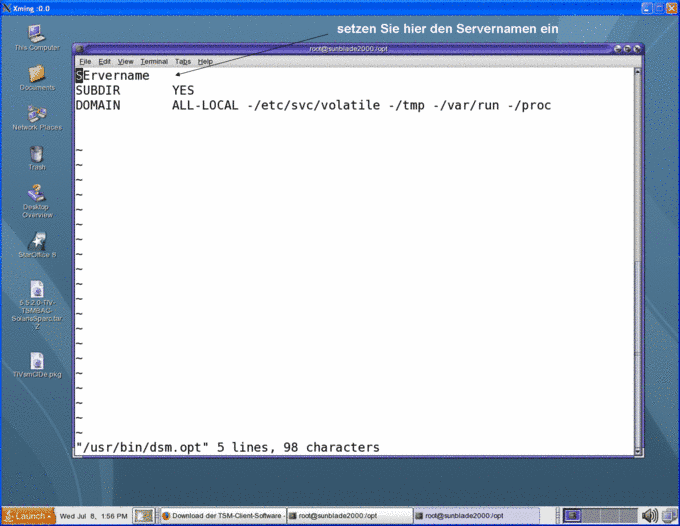
The configuration file /usr/bin/dsm.opt

For example, dsm.opt could look like this:


SErvername   RUSTSME
SUBDIR       YES
DOMAIN       ALL-LOCAL -/etc/svc/volatile -/tmp -/var/run -/proc

  • the local file systems are backed up except for “in memory” system directories
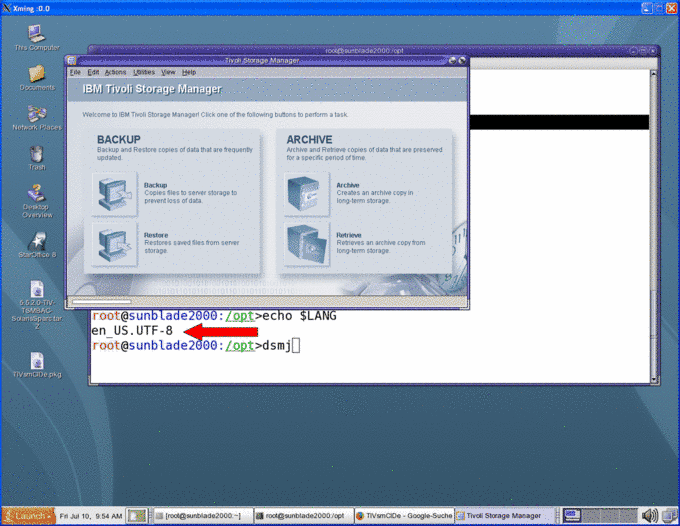
  • You then need to place the environment variables for the TSM client, e.g. in the .bashrc for root. This also ensures that the files with umlauts in the name can be backed up.
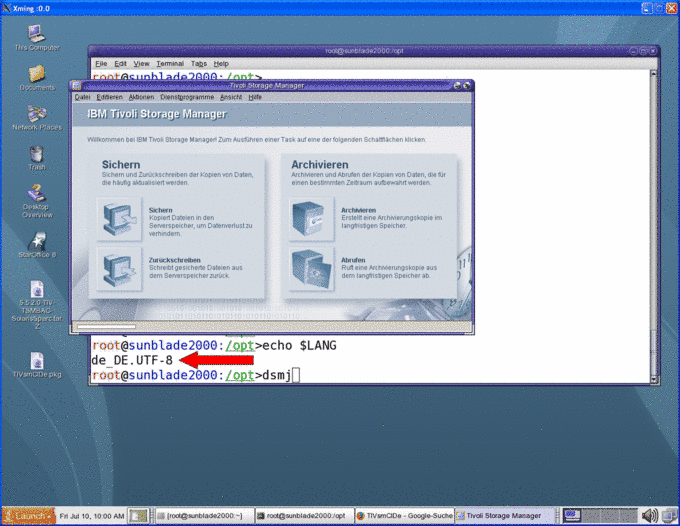
    If you have installed the language package and activate the line: LANG=de_DE.UTF-8, the TSM client will also “speak” German with you.
#TSM Config
DSM_DIR=/opt/tivoli/tsm/client/ba/bin
DSM_CONFIG=/opt/tivoli/tsm/client/ba/bin/dsm.opt
DSM_CONFIG=/usr/bin/dsm.opt
DSM_LOG=/var/log/tsm
LANG=en_US.UTF-8
#LANG=de_DE.UTF-8
LC_CTYPE=de_DE.UTF-8
export DSM_DIR DSM_CONFIG DSM_LOG LC_CTYPE LANG

If you have  not registered your computer for automated back-up, you are now finished and can start the back-up process.

  • with dsmj you start the TSM client GUI. (After entering the password once, it is saved and no longer requested)
  • with dsmc, you start the TSM client command line.


 Configuration of scheduler (for automated back-up)

If you have registered your computer for automatic back-up, you will still need to configure the Client Scheduler.
  • Save the file dsmcad.xml (e.g. in /tmp) with the following content:
<?xml version="1.0"?>
<!DOCTYPE service_bundle SYSTEM "/usr/share/lib/xml/dtd/service_bundle.dtd.1">
<service_bundle type="manifest" name="TIVsmCba:dsmcad">
  <service name="application/dsmcad" type="service" version="5">
         <create_default_instance enabled="true"/>
                <single_instance/>
                <dependency name="fs-local" grouping="require_all" restart_on="none" type="service">
                        <service_fmri value="svc:/system/filesystem/local"/>
                </dependency>
                <exec_method type="method" name="start" exec="/opt/tivoli/tsm/client/ba/bin/dsmcad" timeout_seconds="60">
                        <method_context working_directory="/opt/tivoli/tsm/client/ba/bin"/>
                </exec_method>
                <exec_method type="method" name="stop" exec=":kill" timeout_seconds="5"/>
                 <stability value="Unstable"/>
                 <template>
                 <common_name>
    <loctext xml:lang="C">Tivoli Storage Manager Client dsmcad</loctext>
                   </common_name>
                        </template>
          </service>
</service_bundle>
  • With the following steps, you implement the Client Scheduler as a service:

cp /tmp/dsmcad.xml /var/svc/manifest/application

svccfg validate /var/svc/manifest/application/dsmcad.xml

svccfg import /var/svc/manifest/application/dsmcad.xml

The dsmcad is now running and connecting to the TSM server. Setting up the Client Scheduler is now complete. After each re-boot, it will be automatically started. You will not need to start it “by hand.”
  • Using the automated back-up, this means:

    starting the scheduler (if that is necessary)
    stopping the scheduler (if that is necessary)
    re-starting the scheduler (e.g. if the files dsm.sys and dsm.opt have been changed)
    Checking whether the scheduler is running.

    The commands for this are:

svcadm enable dsmcad

svcadm disable dsmcad

svcadm restart dsmcad

svcs dsmcad


Do you have questions or comments about this site? contact form