Back-up / Restore with the graphic client (GUI)
The following instructions were created using Windows XP SP3. Since the TSM client is a Java application, the graphic client looks similar in all platforms and the instructions therefore apply to Mac OS X, Solaris, and AIX, as well.
Back-up
| If you start the Client GUI, you will go to the main menu. Click on the icon next to Sichern (save) to back up files on the TSM server. |  |
| On the following screen, you can select which files and drives are to be backed up. By clicking on the plus symbol next to local, you can choose from your local drives. | 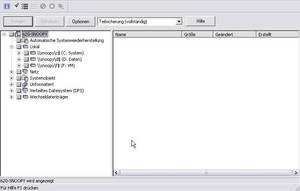 |
| It is possible to have the local paths of the partitions / mount points shown. To mark a file for back up, click on the box to the left of the file. A checkmark will be placed as visual feedback. | 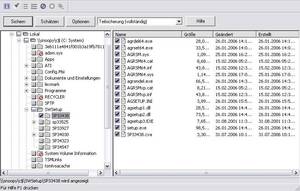 |
| If you want to back up all local drives, then place a checkmark next to Lokal (local). | 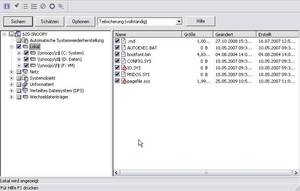 |
| Note for Windows platforms: In addition to the files on the partitions, it is also possible to back up the system objects (registry, etc.). These files can be used to restore Windows. | 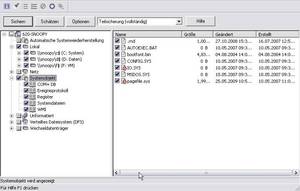 |
With Windows, we recommend that you regularly back up the system objects. Once you have made your selection, click on Sichern (save) to start the back up. | 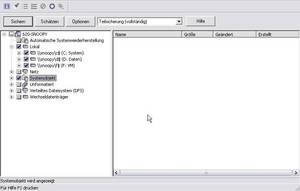 |
| You can see that the back up has started. Because the client has to check which files and objects are to be backed up, it can take a while for the first files to be transferred. By clicking on Bericht (report), you can view the details on the current back-up process. | 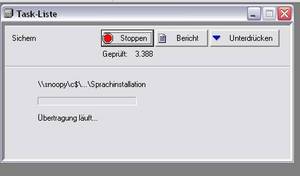 |
| Detailed view of the current back-up process. | 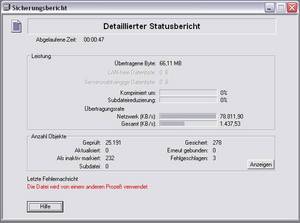 |
Restore
| To recover previously backed up data, click on the symbol next to Zurückschreiben (write back). | 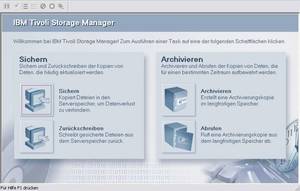 |
| When recovering, navigation is exactly the same as when backing up files. Clicking on file level shows the directories and files that are backed up on the TSM server. Mark the files and folders with a checkmark (click on the box next to the directory/file). | 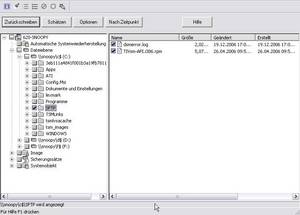 |
| Active/inactive files By default, the TSM client only shows “active” files. If you would like to recover a previous version of a file, click on Ansicht (view) and then view Aktive/Inaktive (active/inactive) files. This files are marked with a blue dot. | 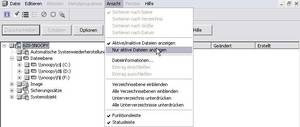 |
| After you have selected all files, click on Zurückschreiben (write back)to start the recovery process. | 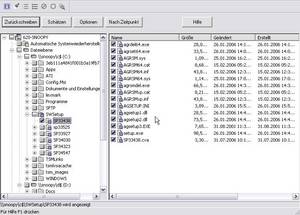 |
| You will be asked where the files should be written back. If you choose the original location, the files are saved in the same directory from which they were backed up. When you click on Zurückschreiben (write back)the recovery process starts. | 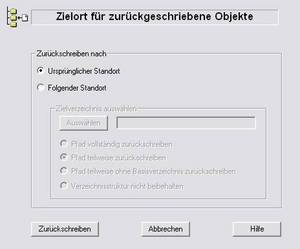 |
By clicking on Folgender Standort (following location), you can choose a different target directory. By clicking on Auswählen (select), you have the possibility to choose a directory. When you click on Zurückschreiben (write back)the recovery process starts. | 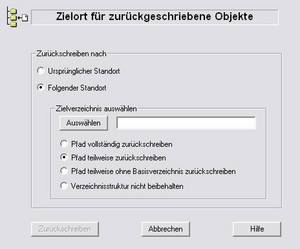 |
Do you have questions or comments about this site? contact form